Photography Framing Tools To Elevate Your Storytelling
Picture this. Great Lighting. Great Subject. Great Surrounding. Great Moment.
You got the shot, but you didn't get the moment.
Ever felt that you got everything right, but it still lacks meaning?
Or you want to start real storytelling with your photography?
Well, this is where framing comes in.
Many people take photos of great things, but few people take great photos of things.
A lot of the time, framing helps you create great shots.
FRAMING
Framing is consciously placing certain elements of a photograph to convey the intended story to the viewer.
Okay, that was fancy. Let me frame it better. *wink*
Framing helps tell stories.
It helps the photographer move the viewer's mind to wherever intended.
However, most photographers just shoot. They don't create. That's the difference.
You look at a close-up of an elephant, you feel its strength.
You take an ultra-wide shot of the elephant with the sky, then you feel the scale of that place.
You either want to create an image that is visually appealing, or emotionally appealing. Both can be achieved strongly with how you frame an image.
FRAMING TOOLS
Here are some tools that help you frame different scenarios.
a) Rule of Thirds
This is very common. It's explained by everyone, but thoroughly understood by few.
I use it instinctively, and it acts as a base for most of my photos.
The Rule of Thirds can be used with other tools that you'll read about after this.
Here, an image is divided into 9 equal blocks, 3 3 3. The blocks help you place things (lion/sky/tree/foreground) into the blocks or lines, to help create balance, direction, scale, and overall visual appeal.
Dead-center for perfection, off-center for story.
Place a subject on one side, leave space. Intentionally, you created tension, space, direction; a story.
You don't have to use this rule, it's just a way to see.
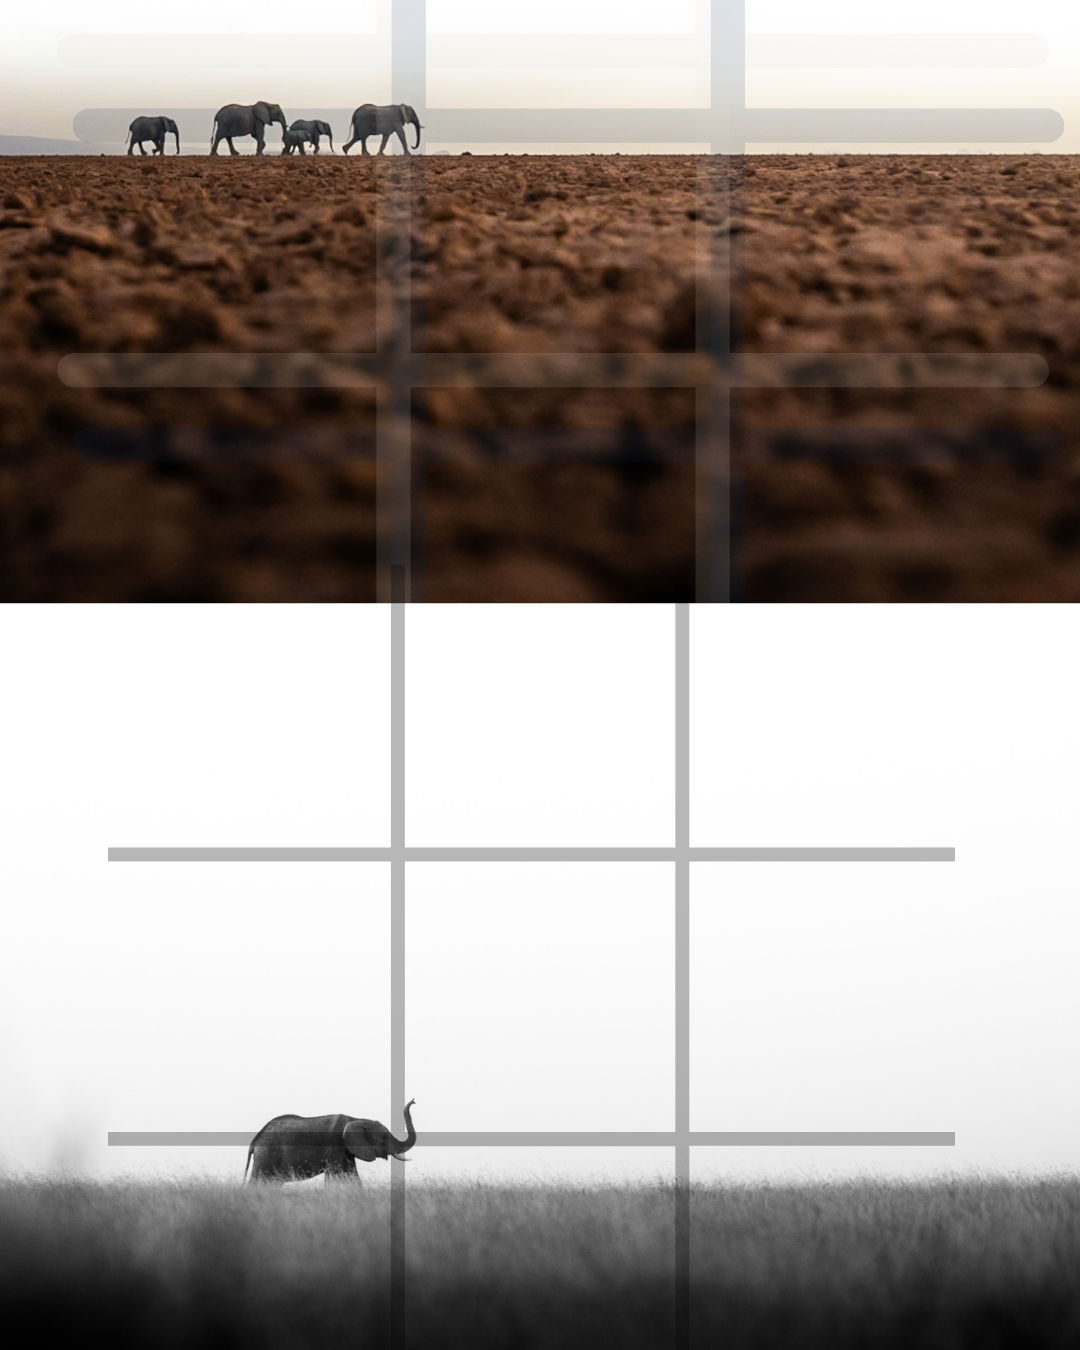
As you can see, both the middle points (4 points of the middle block) and the 9 blocks are used to create well-balanced photos.
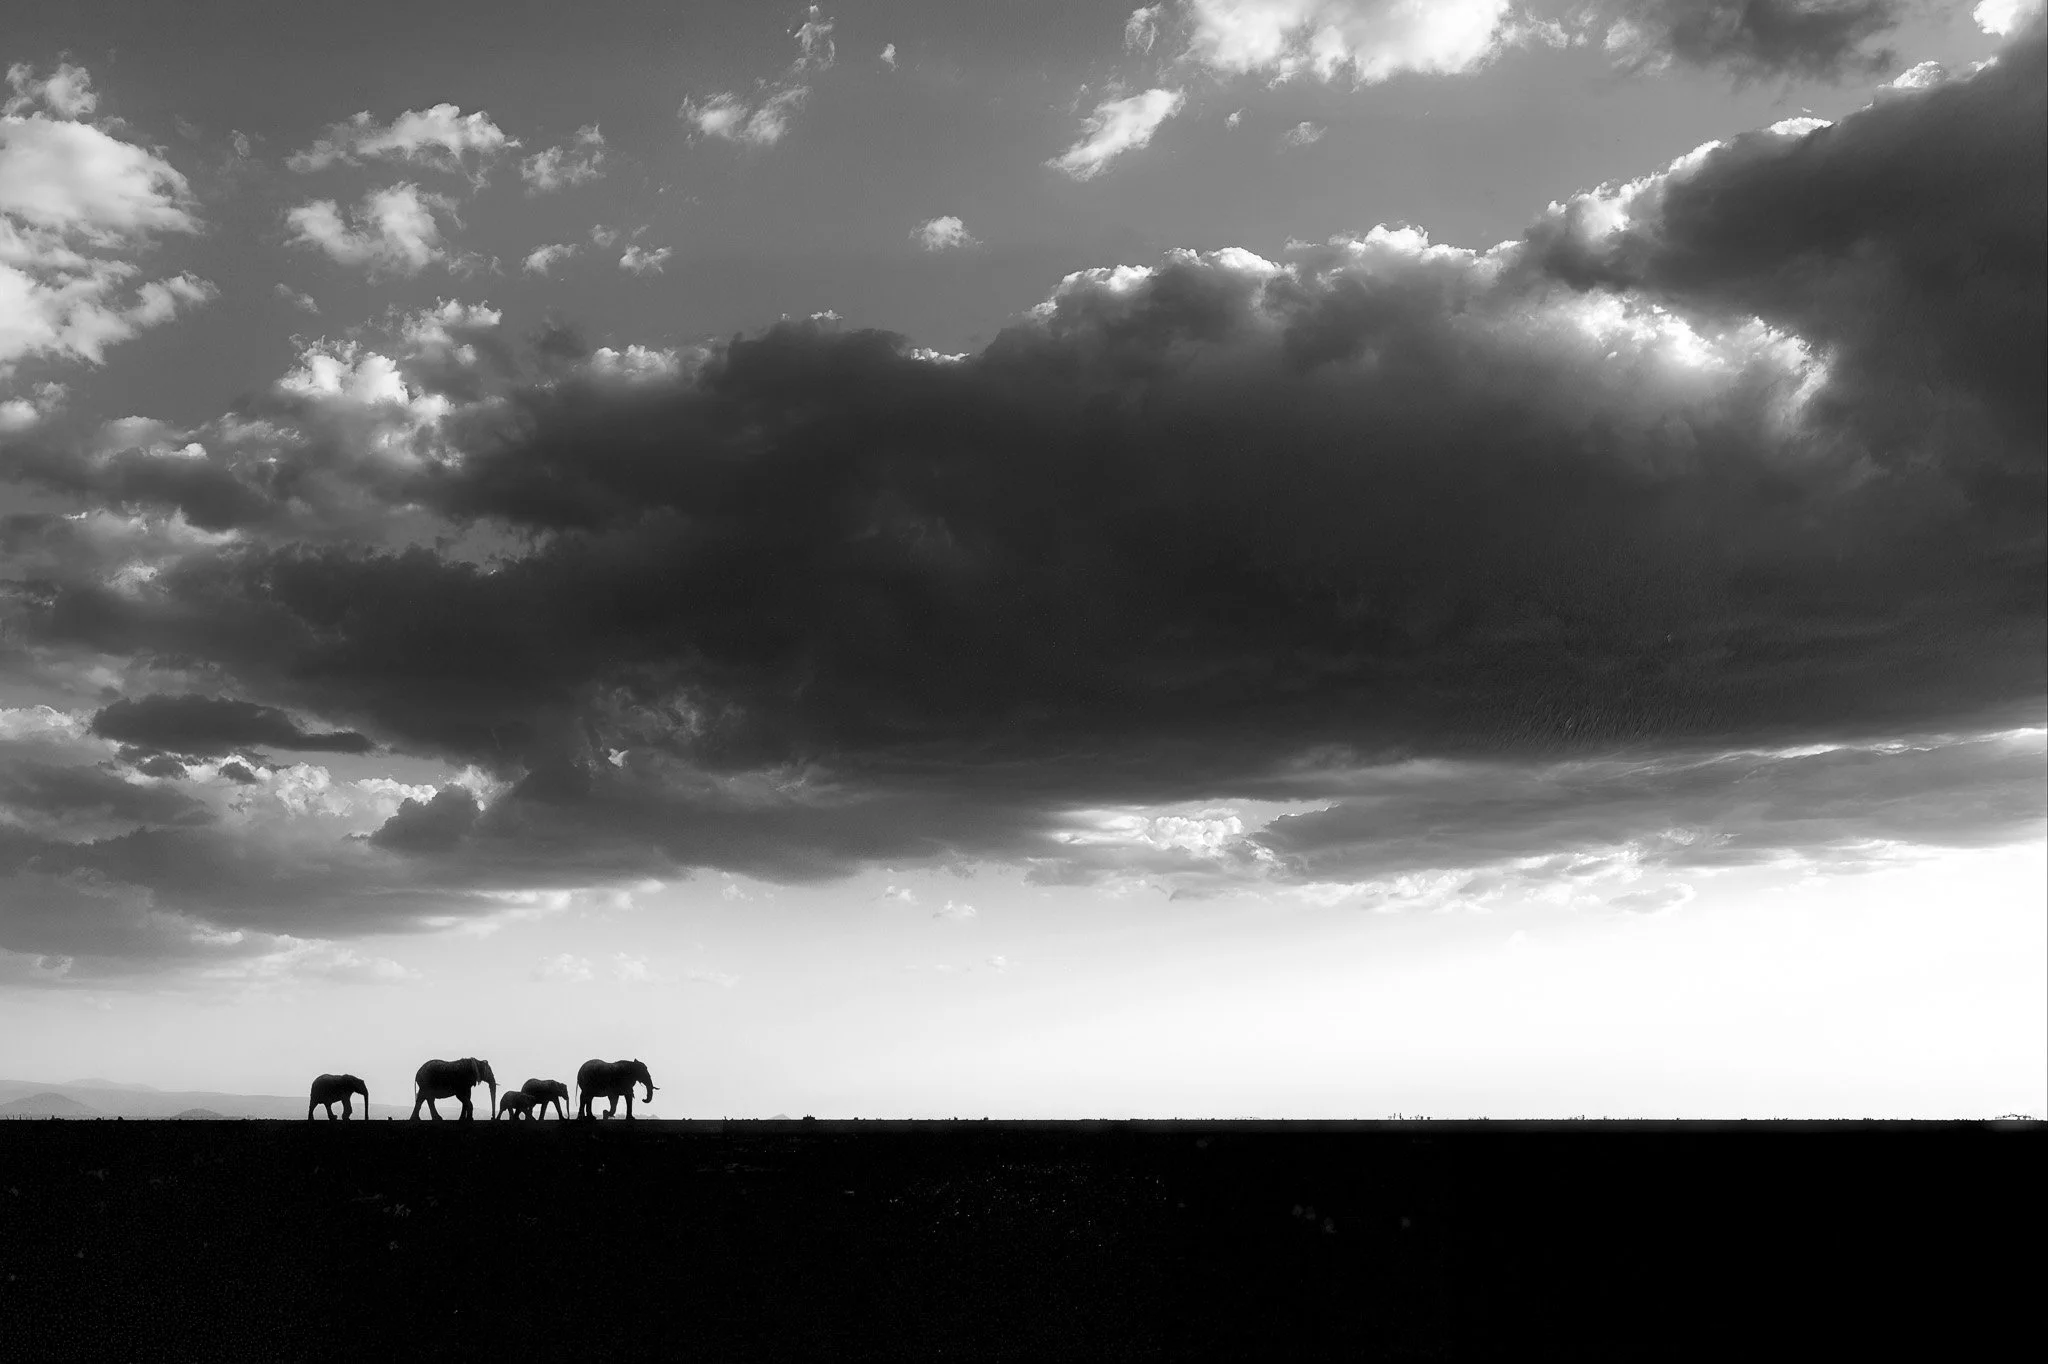
b) Negative Space
After some experience, you'd start to realize that regular portraits feel limiting.
You got the eye contact, the correct shutter speed and even the right action - but yet, it's just a close up.
When things feel tight, you need to zoom out and see the bigger picture.
Zooming out, and leaving empty space gives your photo context.
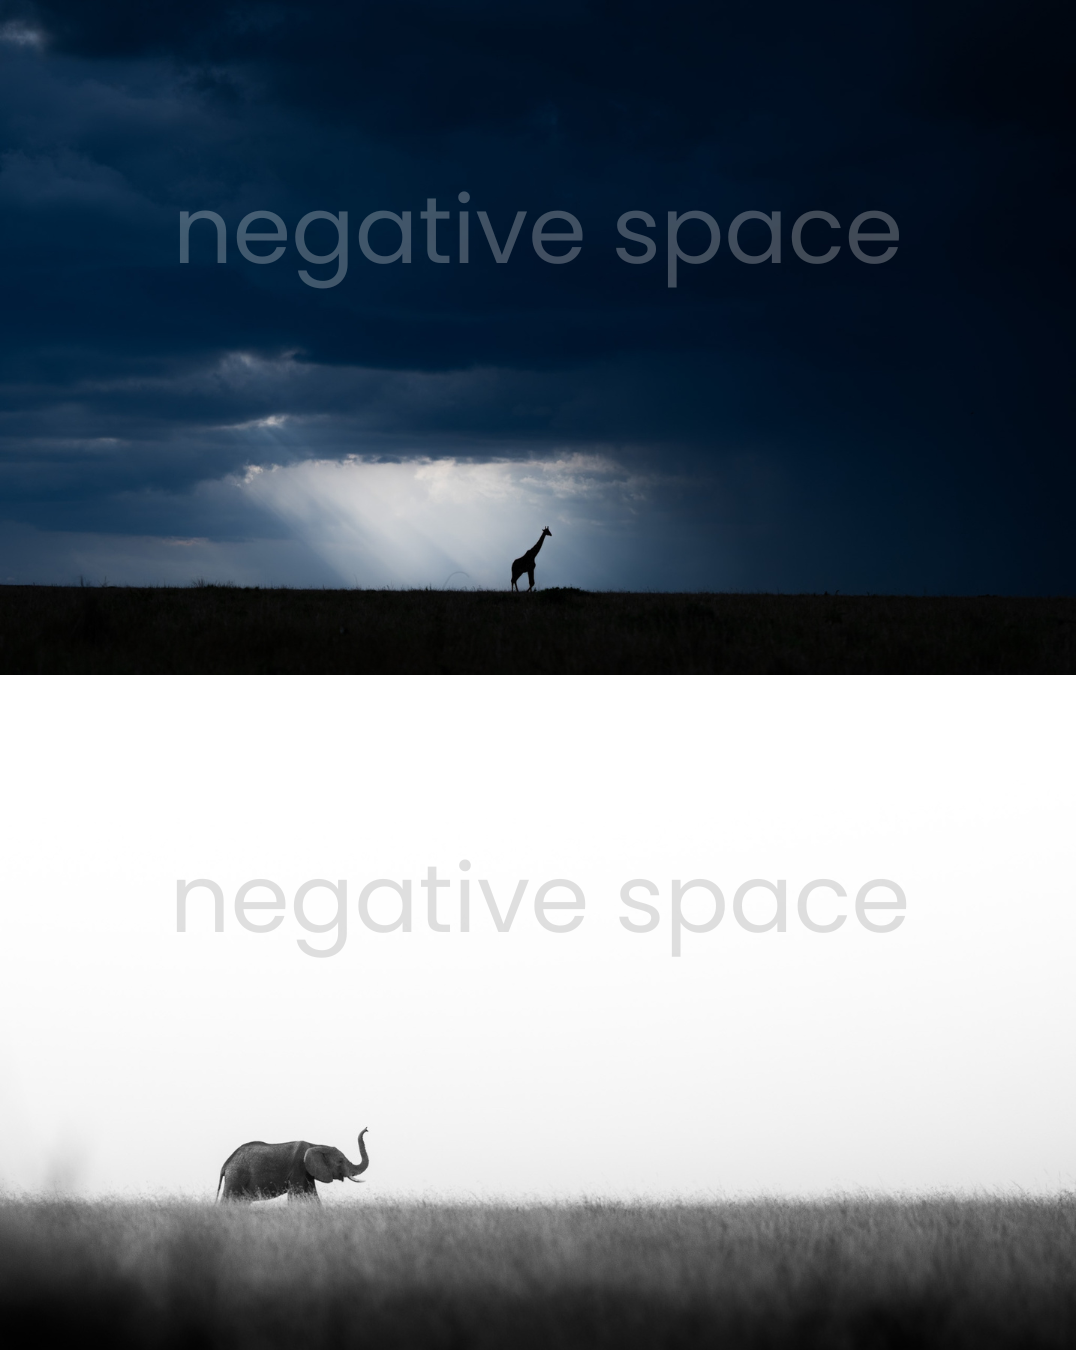
An effect of this framing tool is minimalism. It's a compositional technique that allows your subject to look really tiny, compared to the overall image, thus giving your photo a perspective on scale and environmental context.
I'll speak about directional framing too. More on that later.
c) Leading Lines
Another famous tool used to guide the viewer's eyes towards an intended destination (usually the subject).
In wildlife photography, it's really fun to look for these.
They can be found in roads, rivers, trees, etc.
It feels so right when you create nature to paint your picture :)
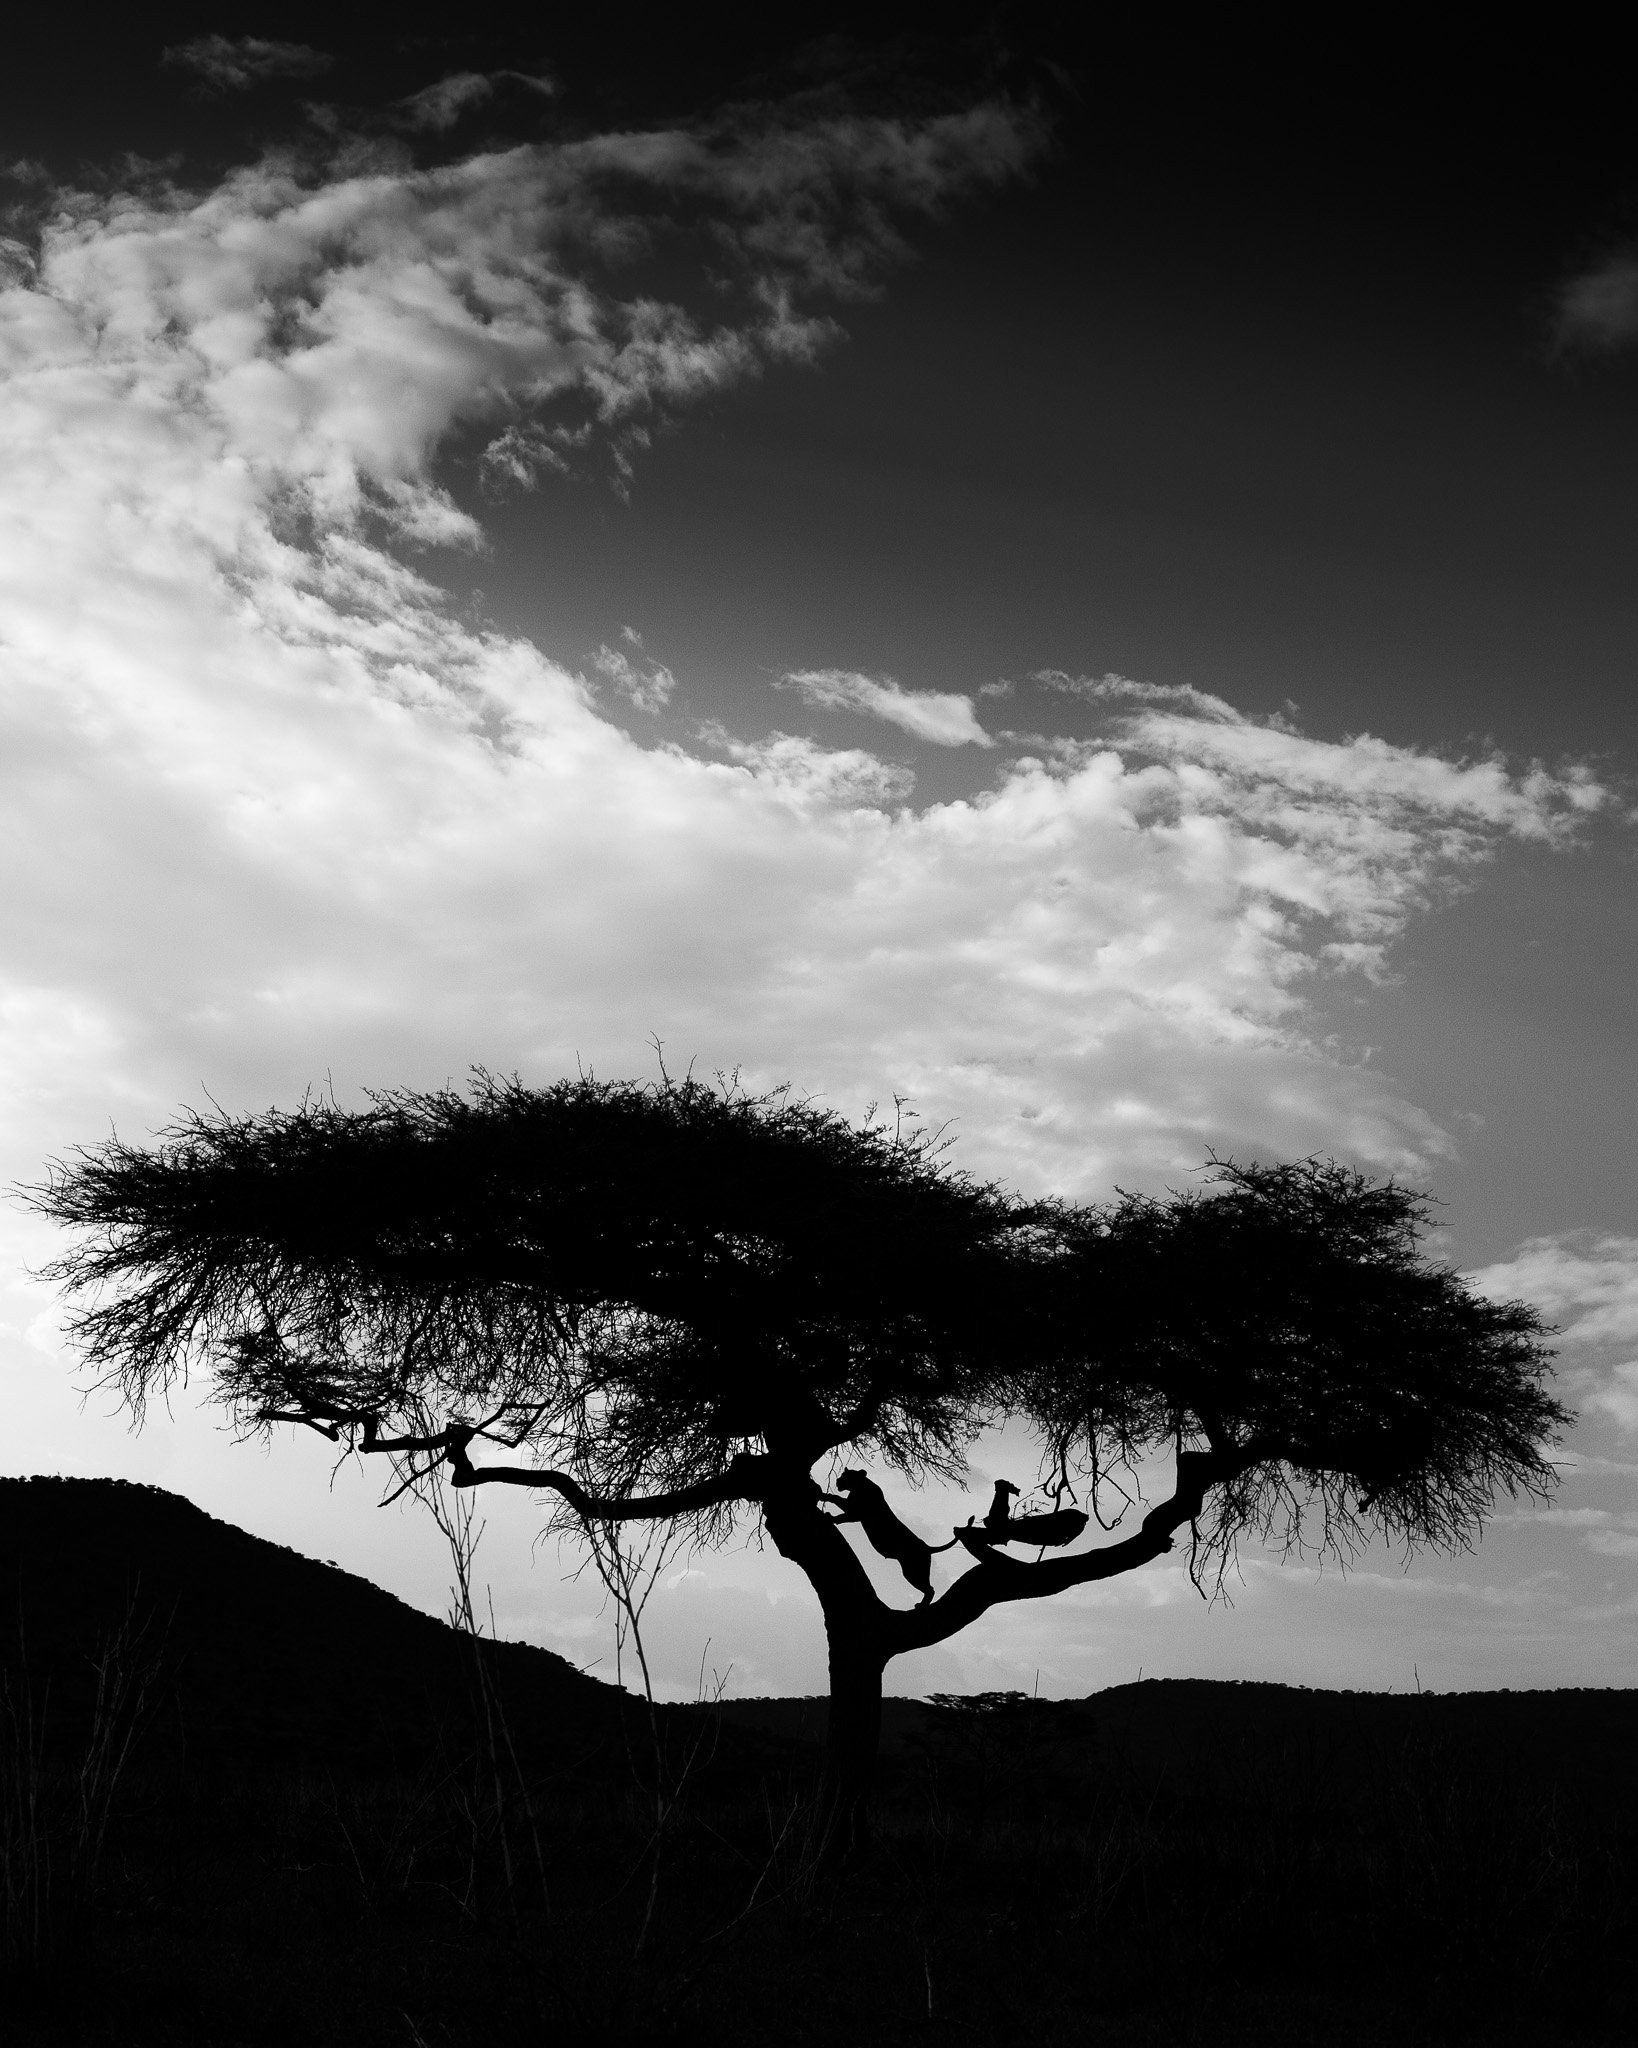
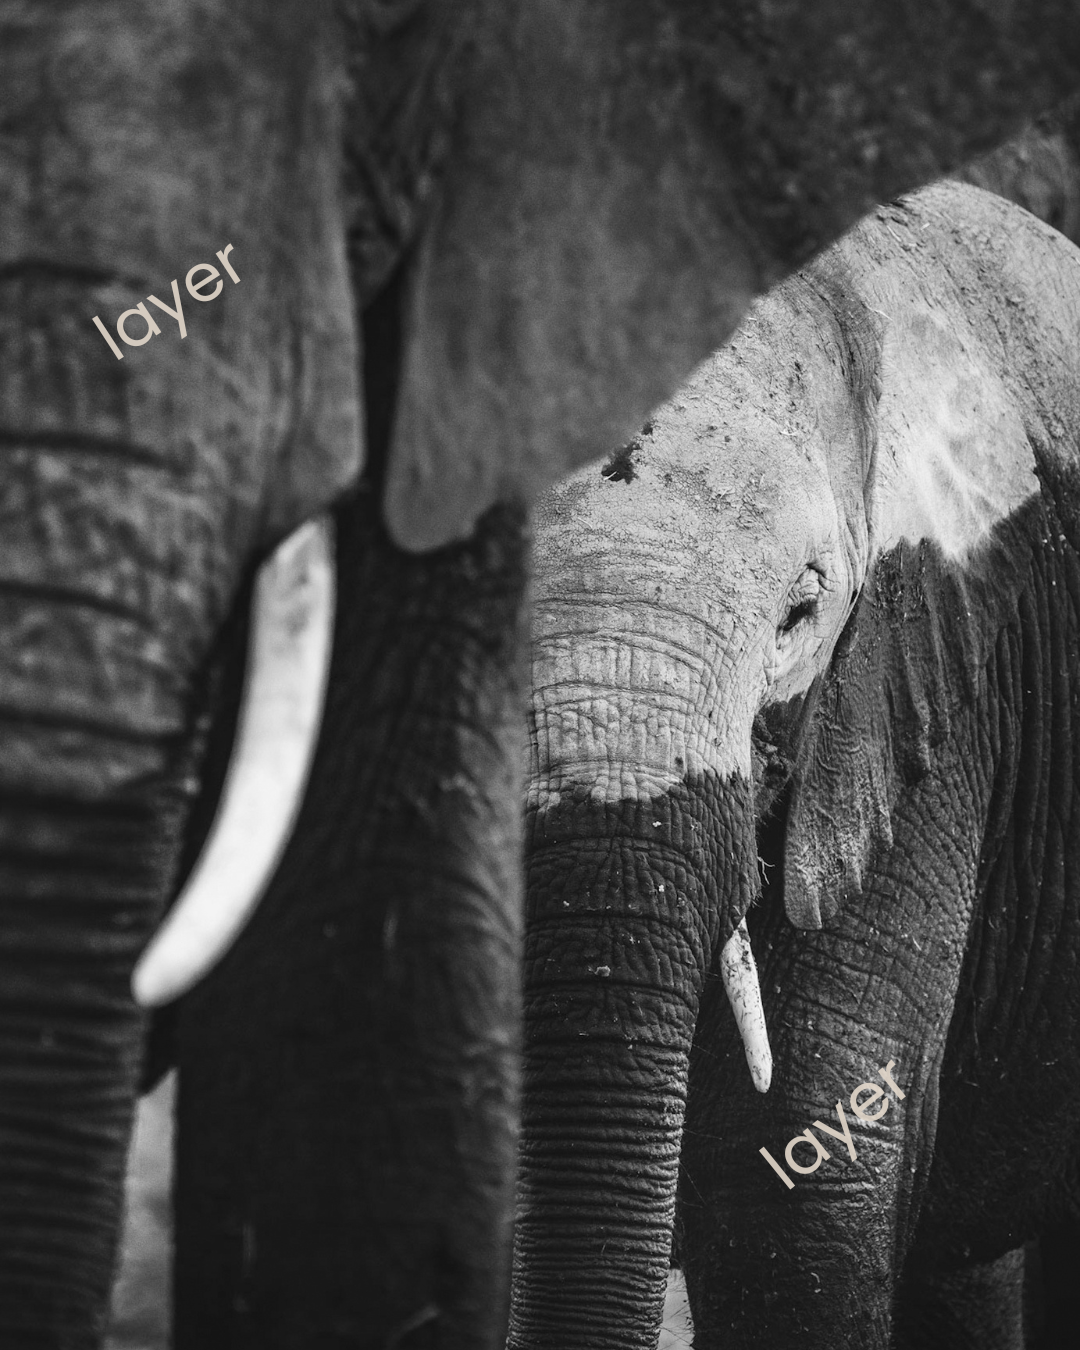
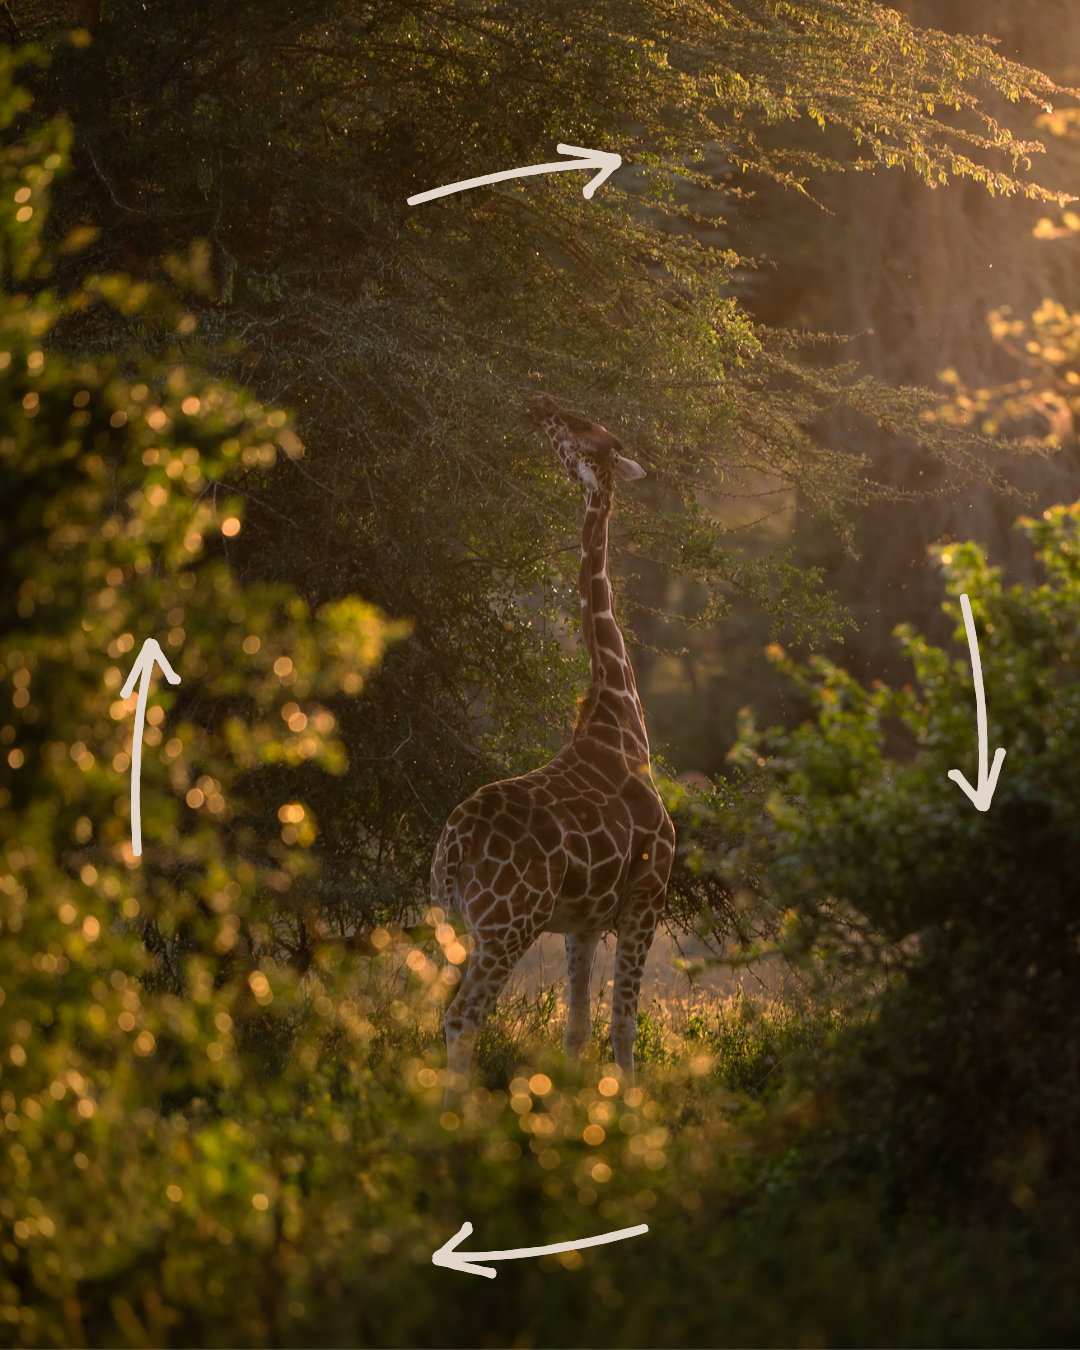
d) Layering
This is particularly used when there are multiple depths of fields. Meaning, when there's more than one thing to look at.
You can either frame different subjects (one infront of the other) in different layers, or you can also layer different elements such as background, foreground, subject, etc.
It's like building a scene by adding multiple dimensions in the image - all to make it more complex and powerful.
Here are examples of both:
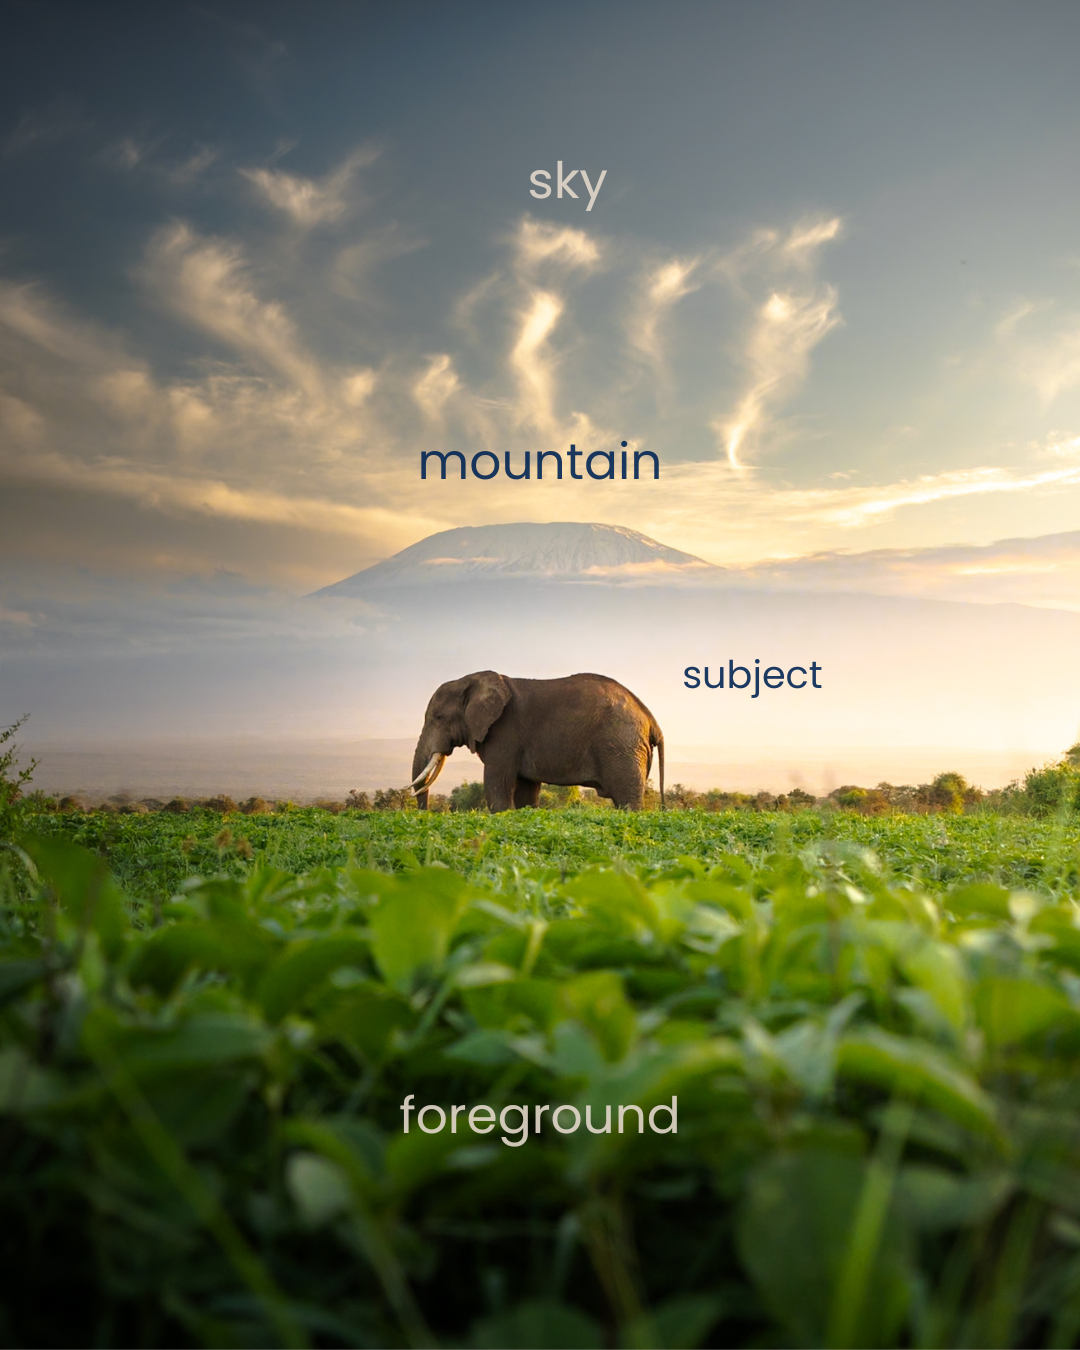
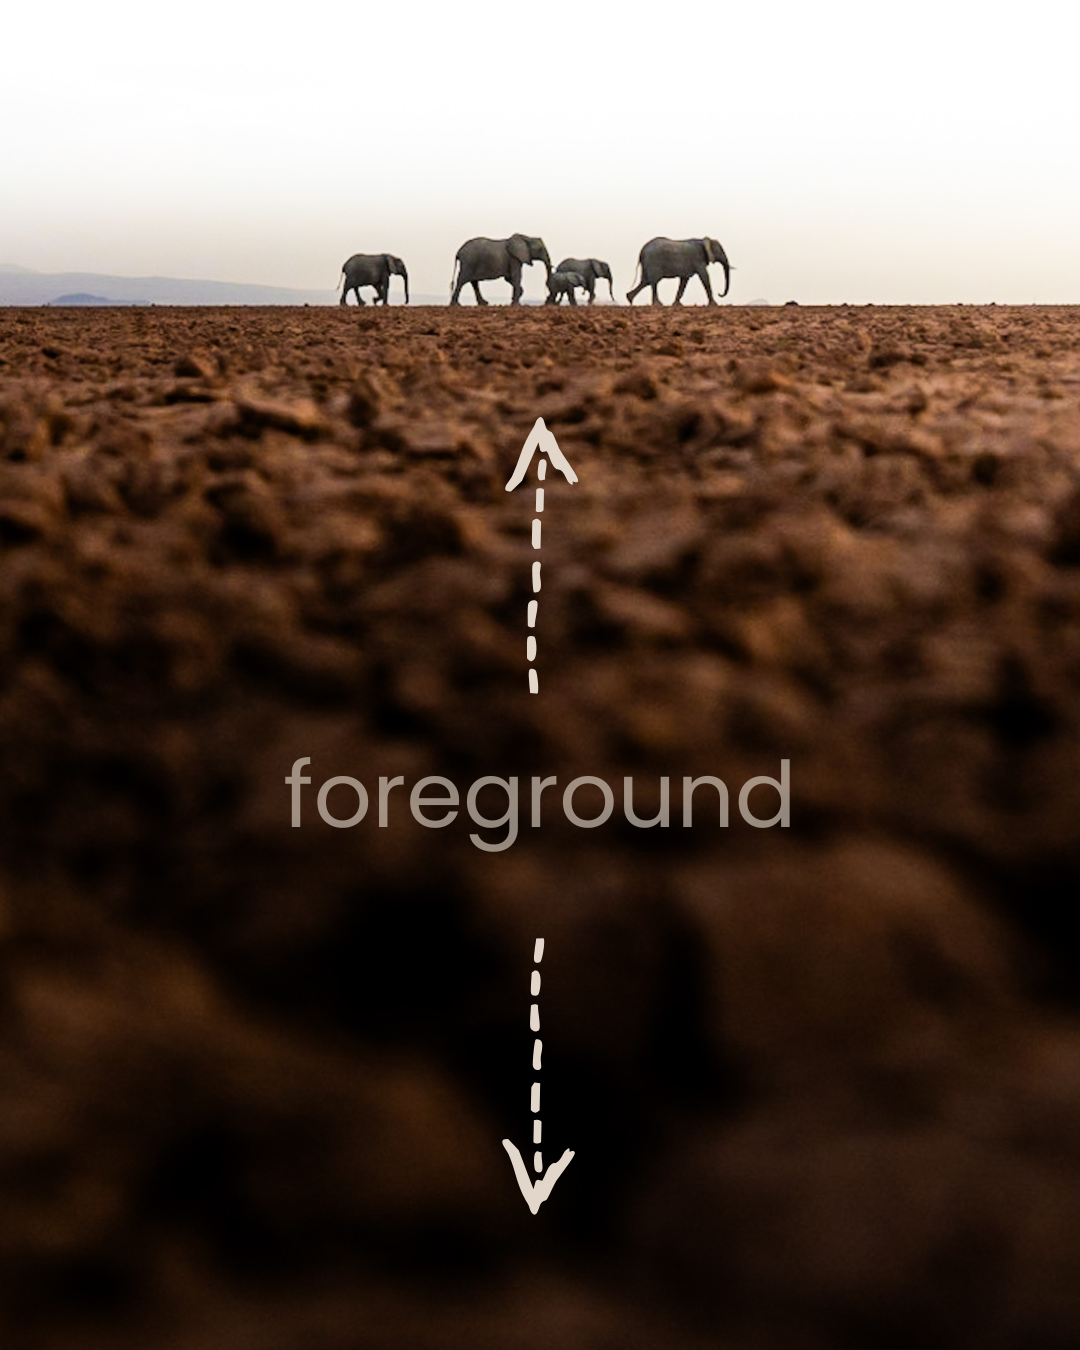
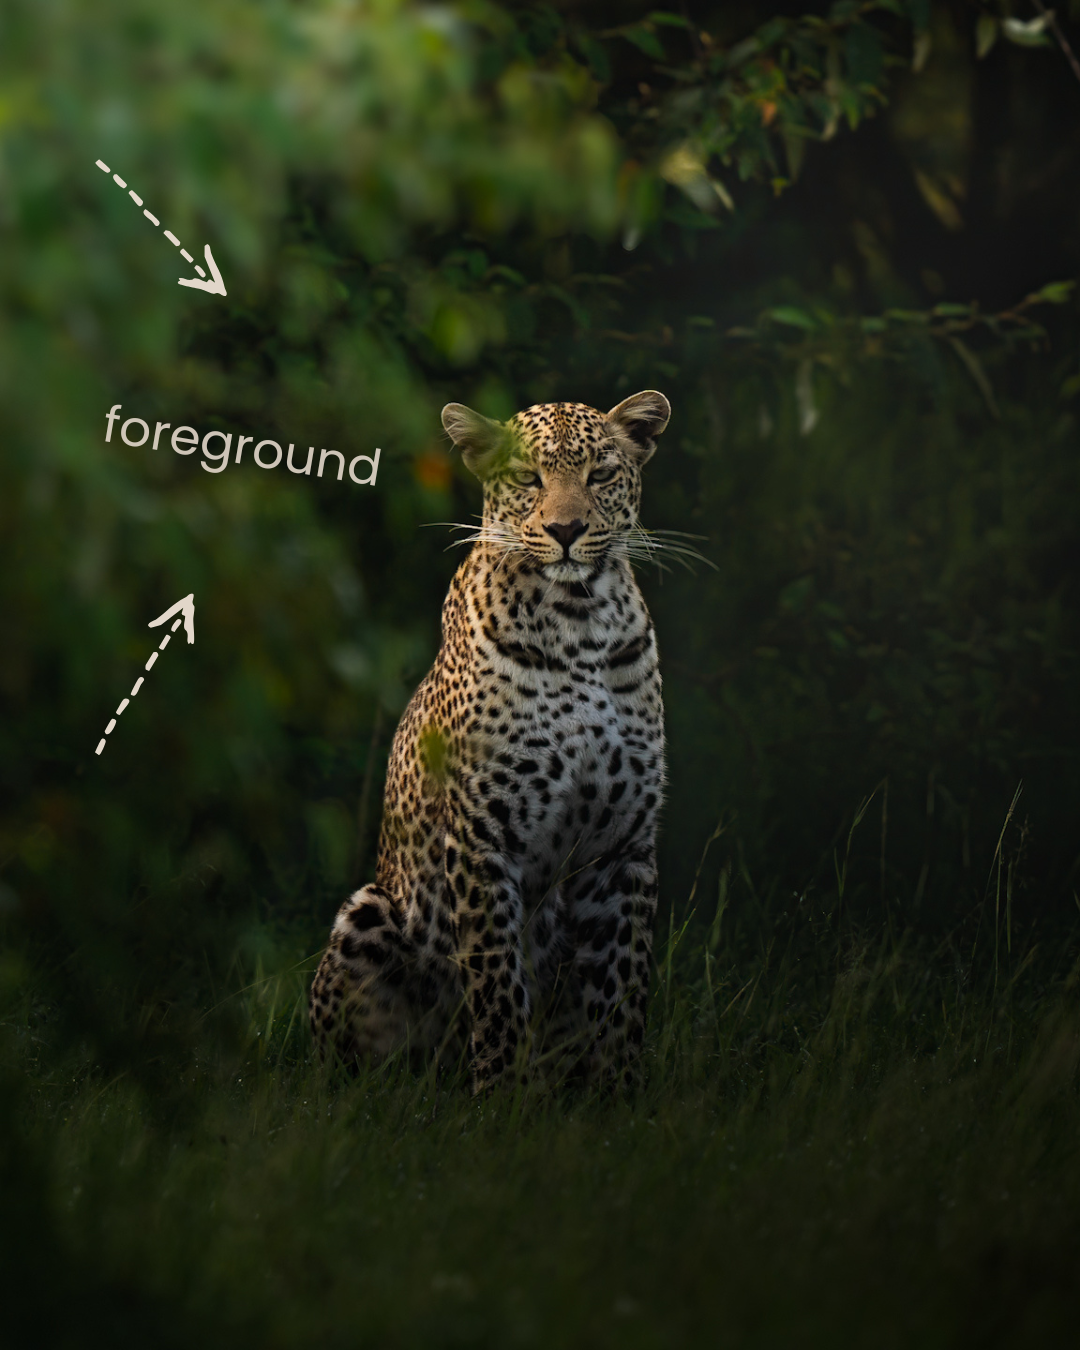
e) Foreground
Many people think that the background is what determines the depth of a photo. Like the background blur and overall color feel of the image.
Unfortunately, most people forget about the foreground, the stuff that is in front of the subject.
It REALLY adds depth, in a unique way.
Sometimes, it is important to note that you have to shoot low to get some foreground, and having a wide aperture lens helps a lot, too! (less than f4).
f) Natural Frames
This is when you use a natural element (trees, skies, animals) to frame your subject.
These shots just look fantastic. It gives me a sense of full immersion, where you're embracing nature's elements to create your photo.
You can really show off your creativity with such.
You'd need to train your eye to see these shots. But trust me, they are everywhere!
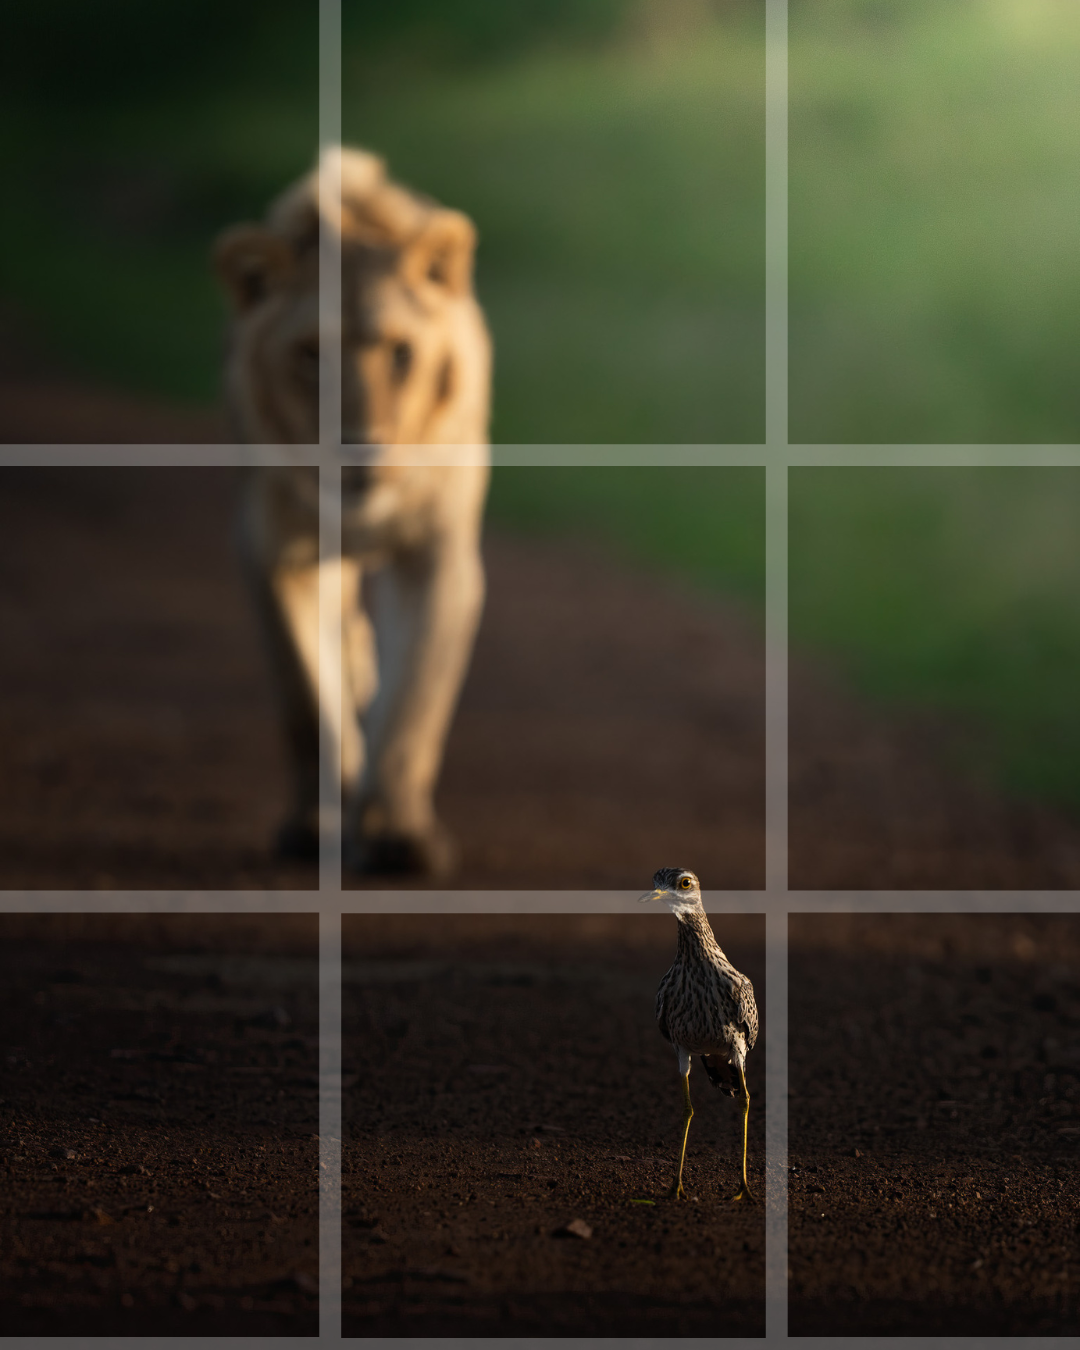
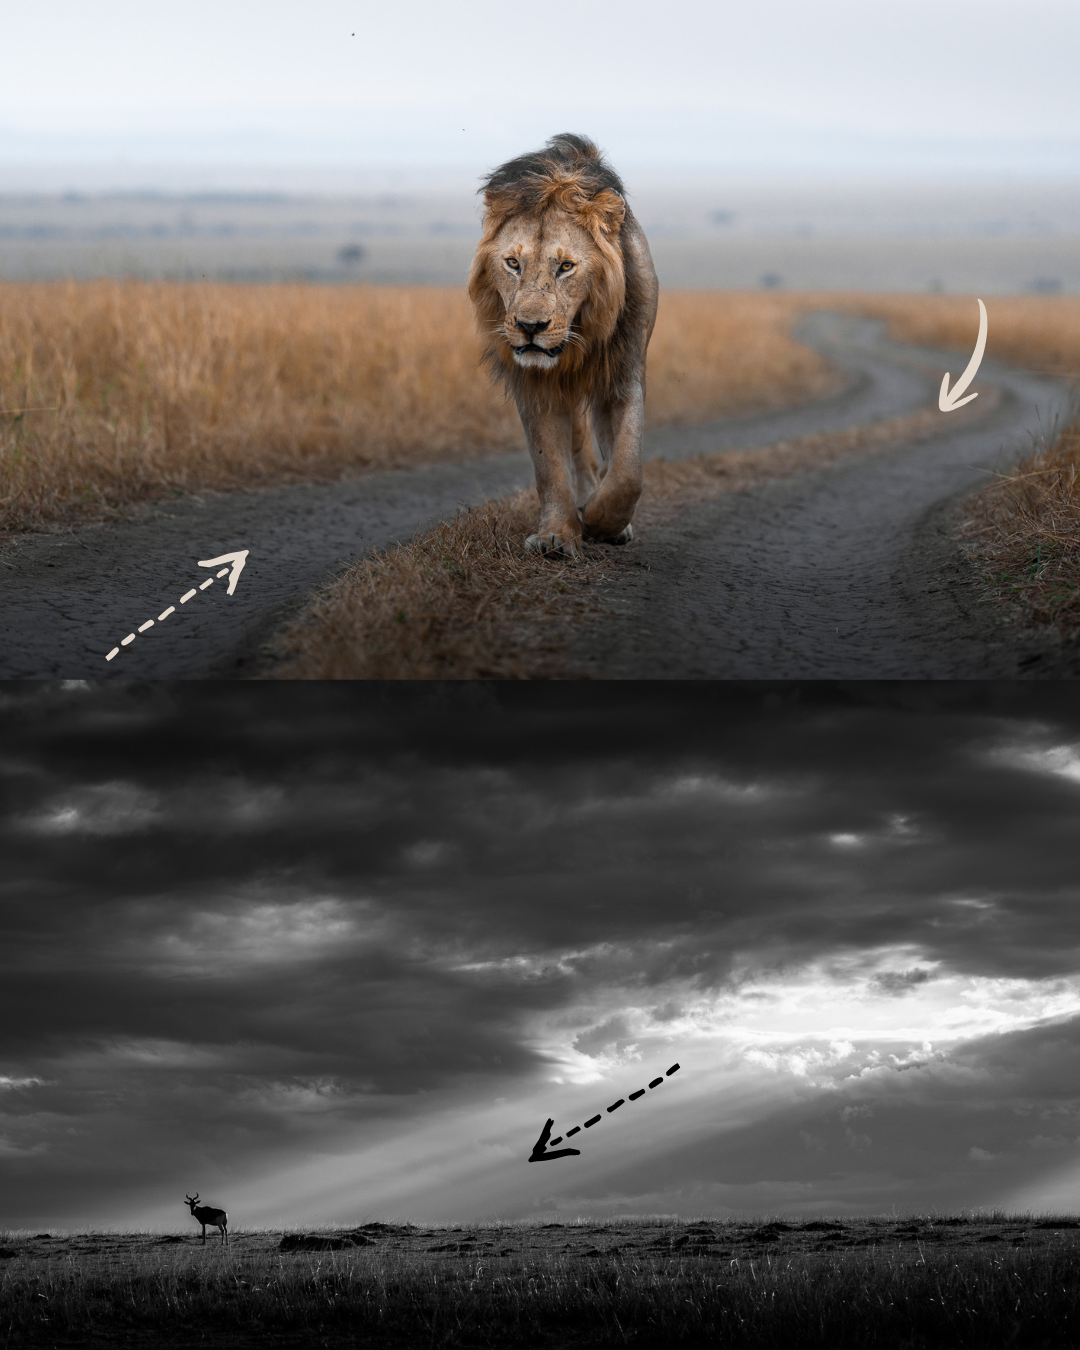
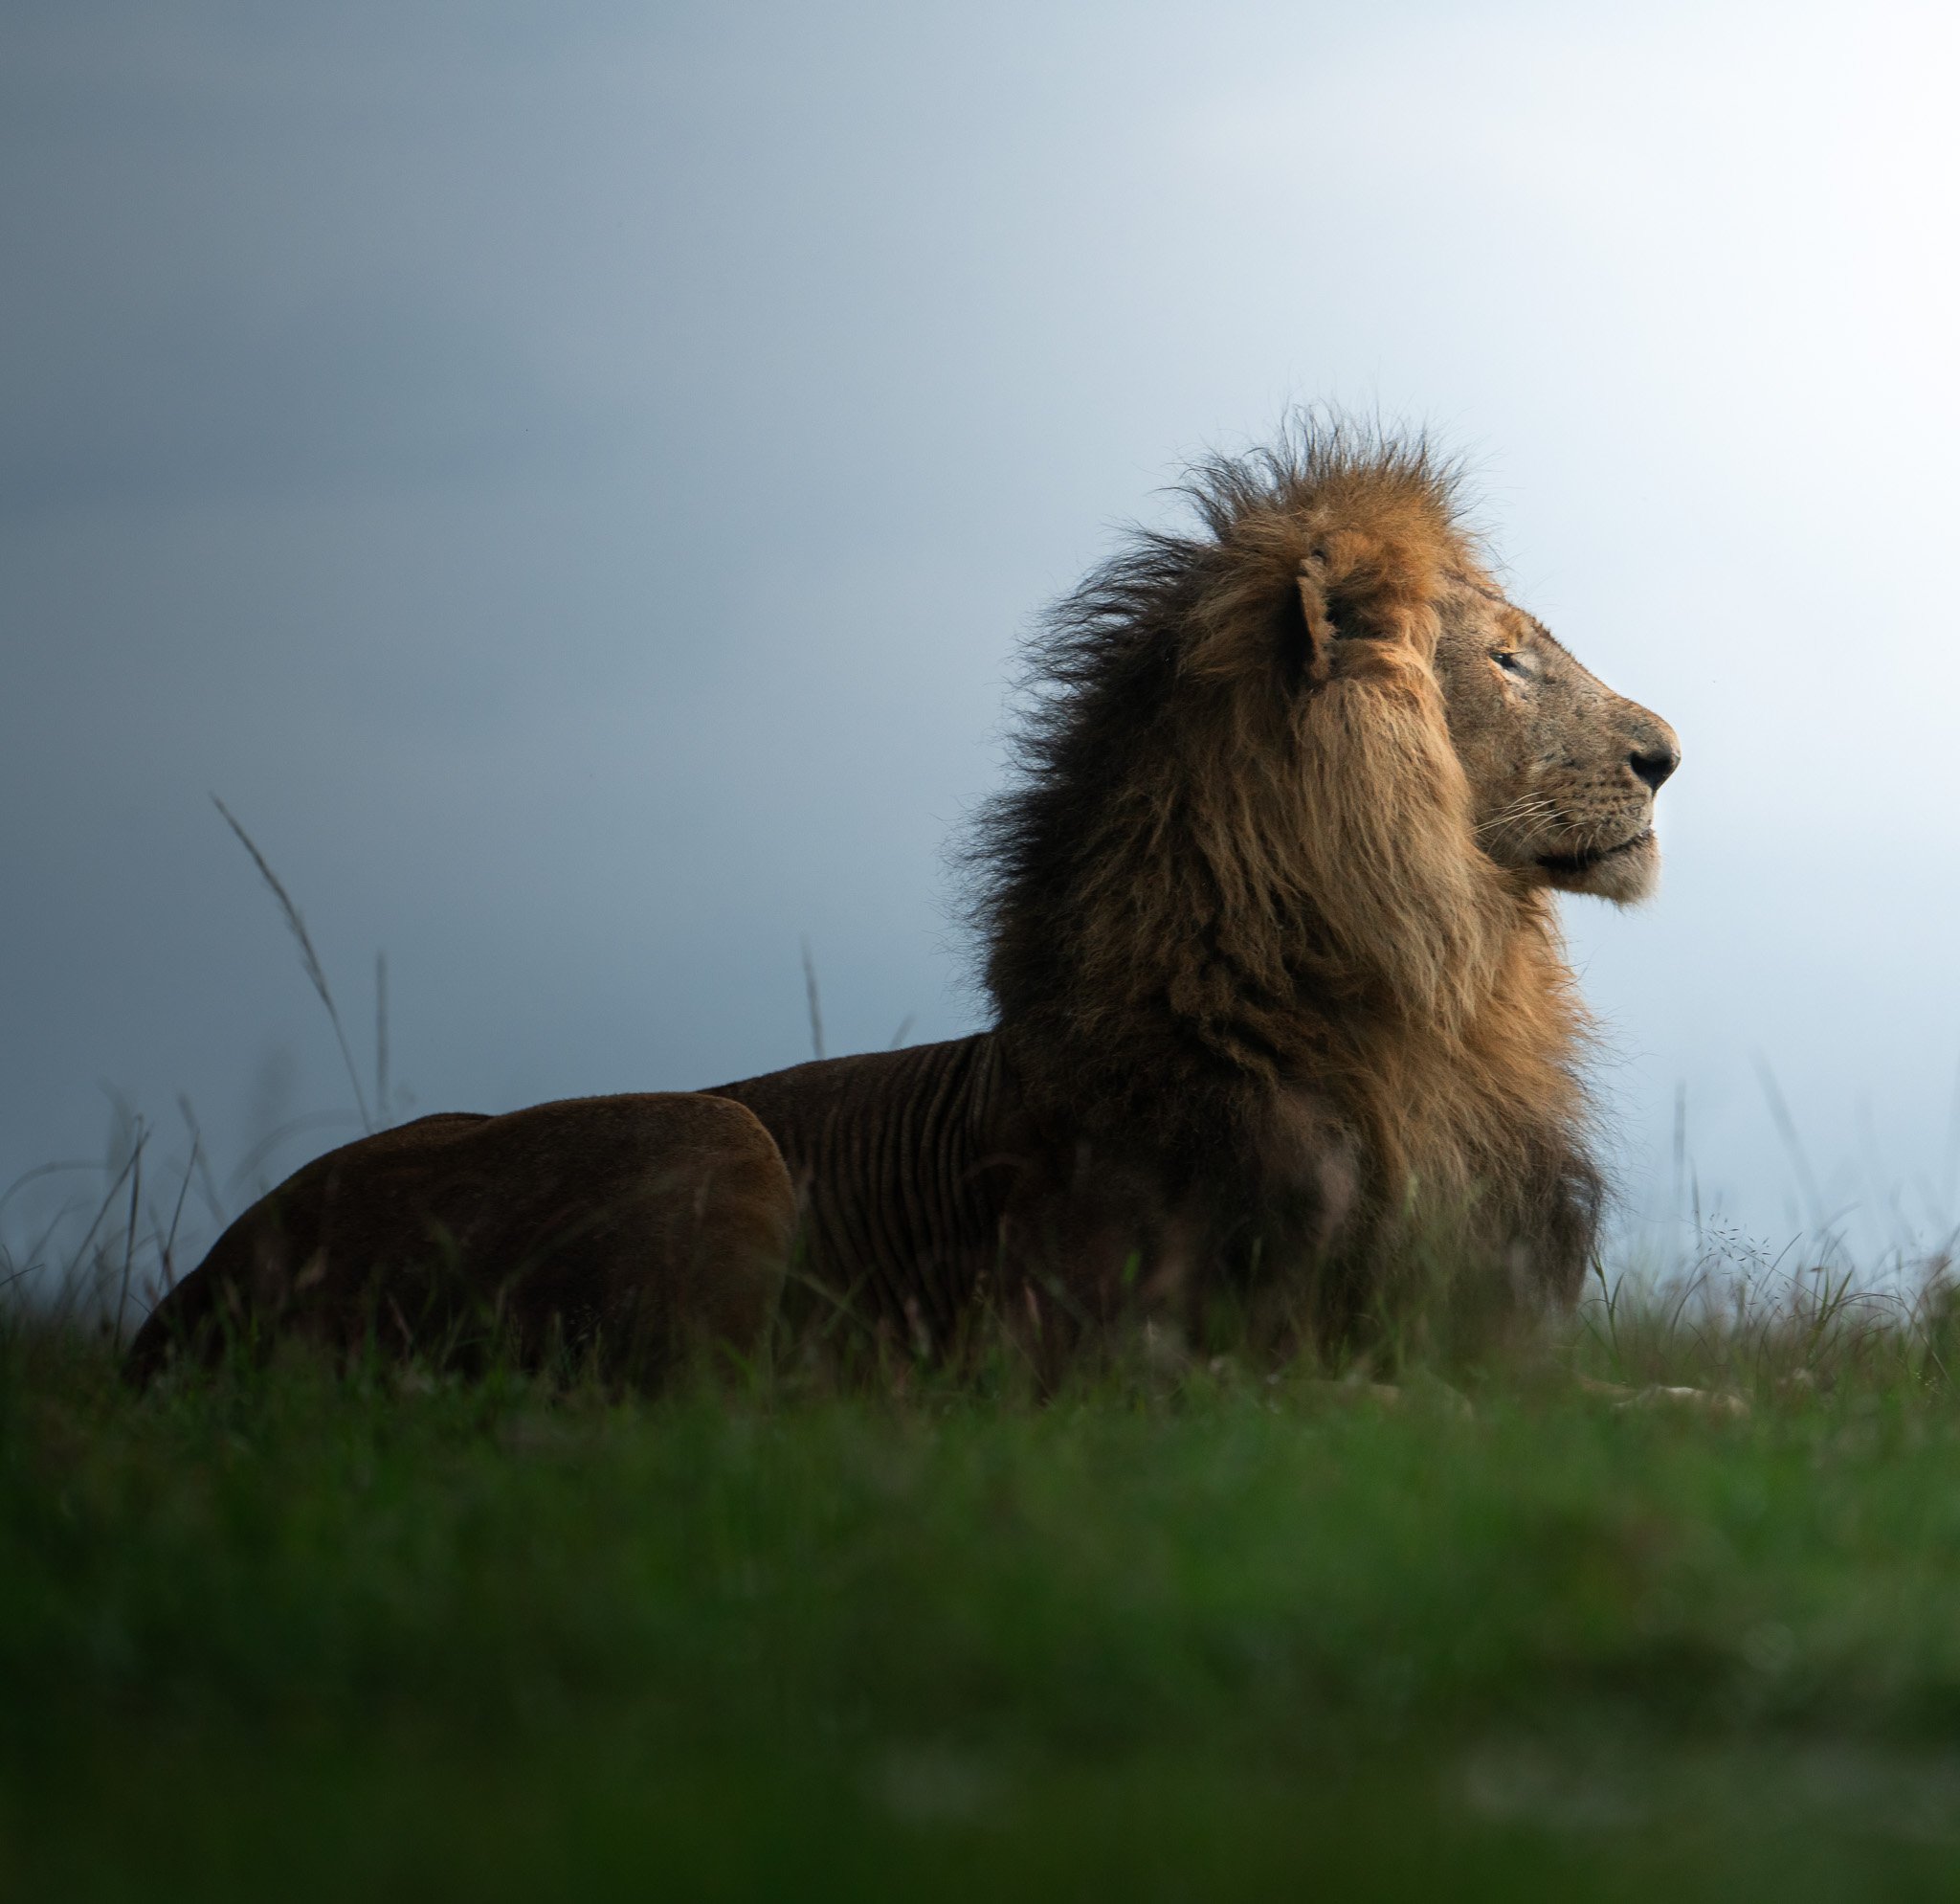
g) Directional framing
This kinda relates to negative space, except that it's more focused on an intended direction.
If your cheetah is looking to the left, you'd want to give it space to see - otherwise it won't survive hehe.
Don't crop your images so tight like this:
The photo looks technically correct, but it lacks meaning. What is the lion looking at? Your finger?
Instead, compose like this:
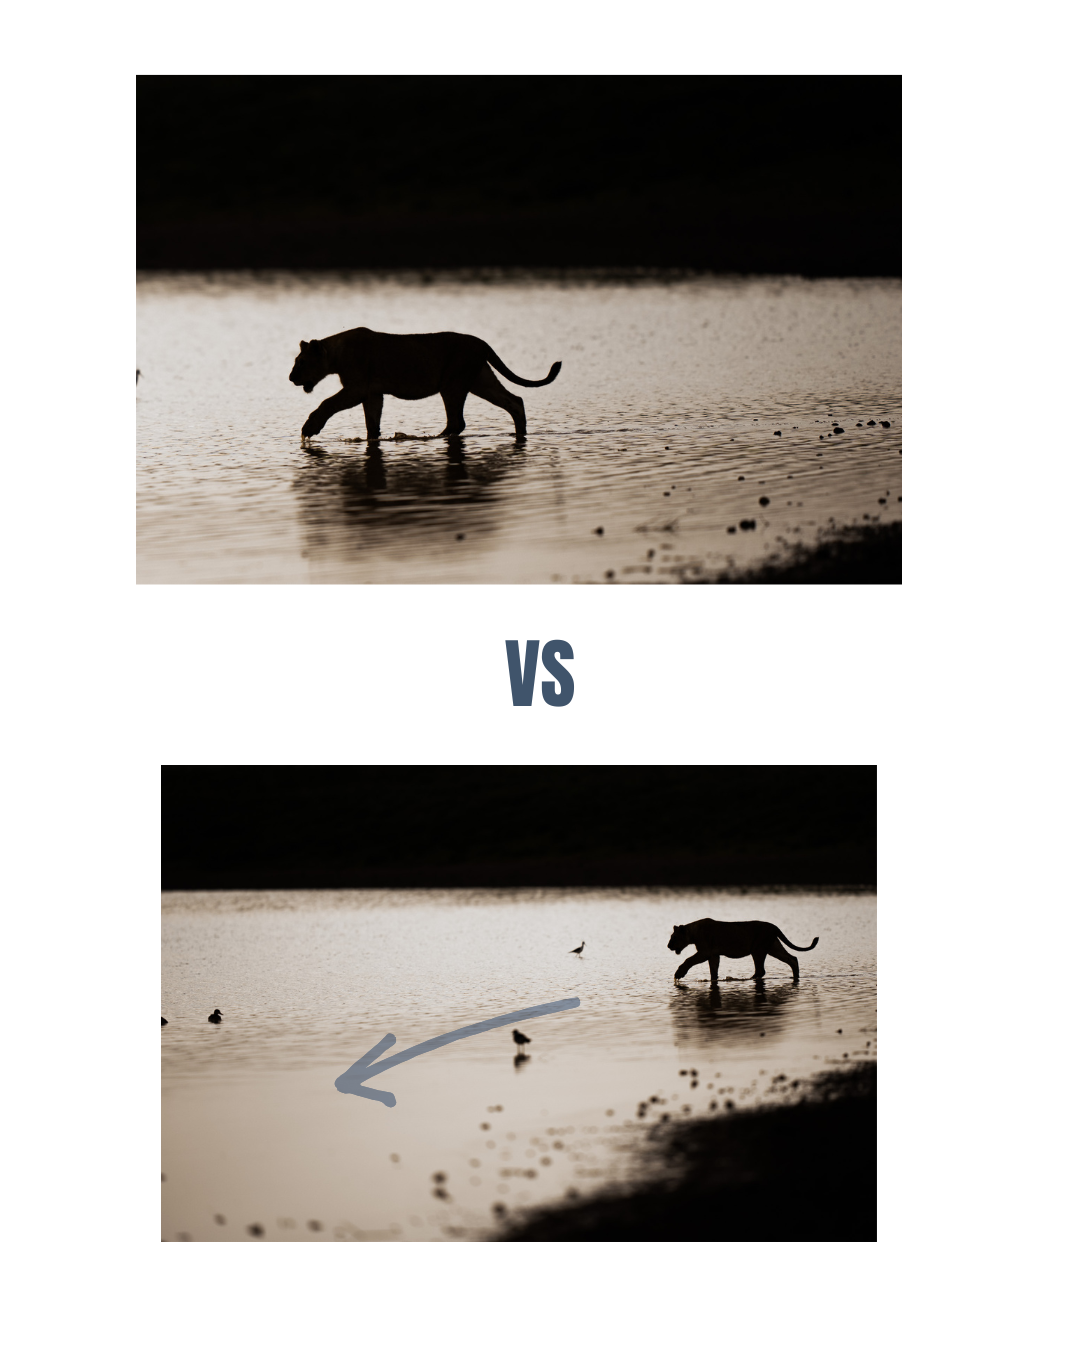
This way, you allowed the lion to move to where it's supposed to go. You just added motion to a still frame!
h) Zooming In:
Sometimes, zoomed-out images tend to have too many distractions.
If you think there's a much better story when you zoom in, go for it!
This is why I say that you can still compose a photo from your laptop, even if you didn't see the final image on the field yet.
Cropping tool = Framing tool
Let me show you a few examples:
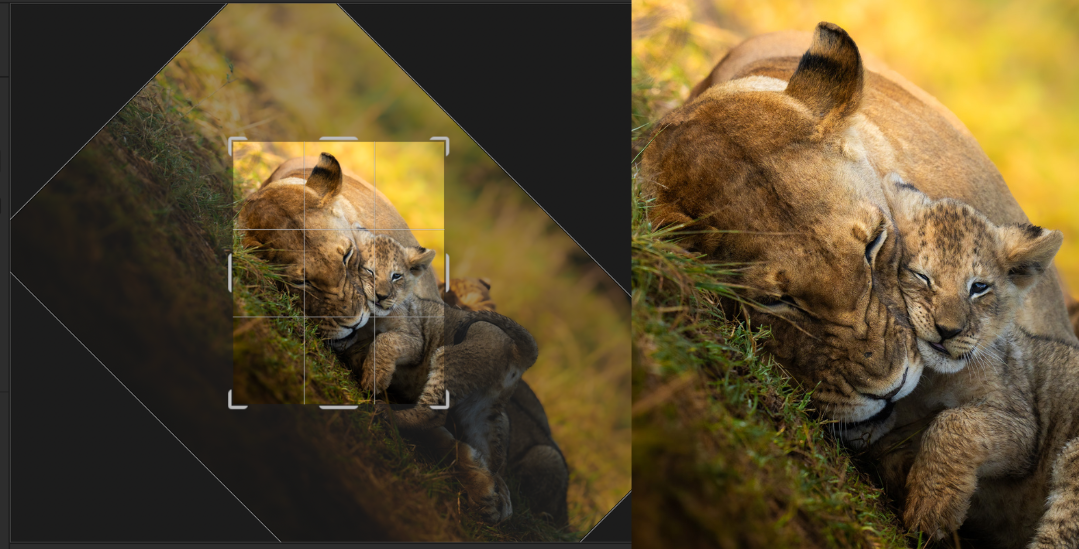
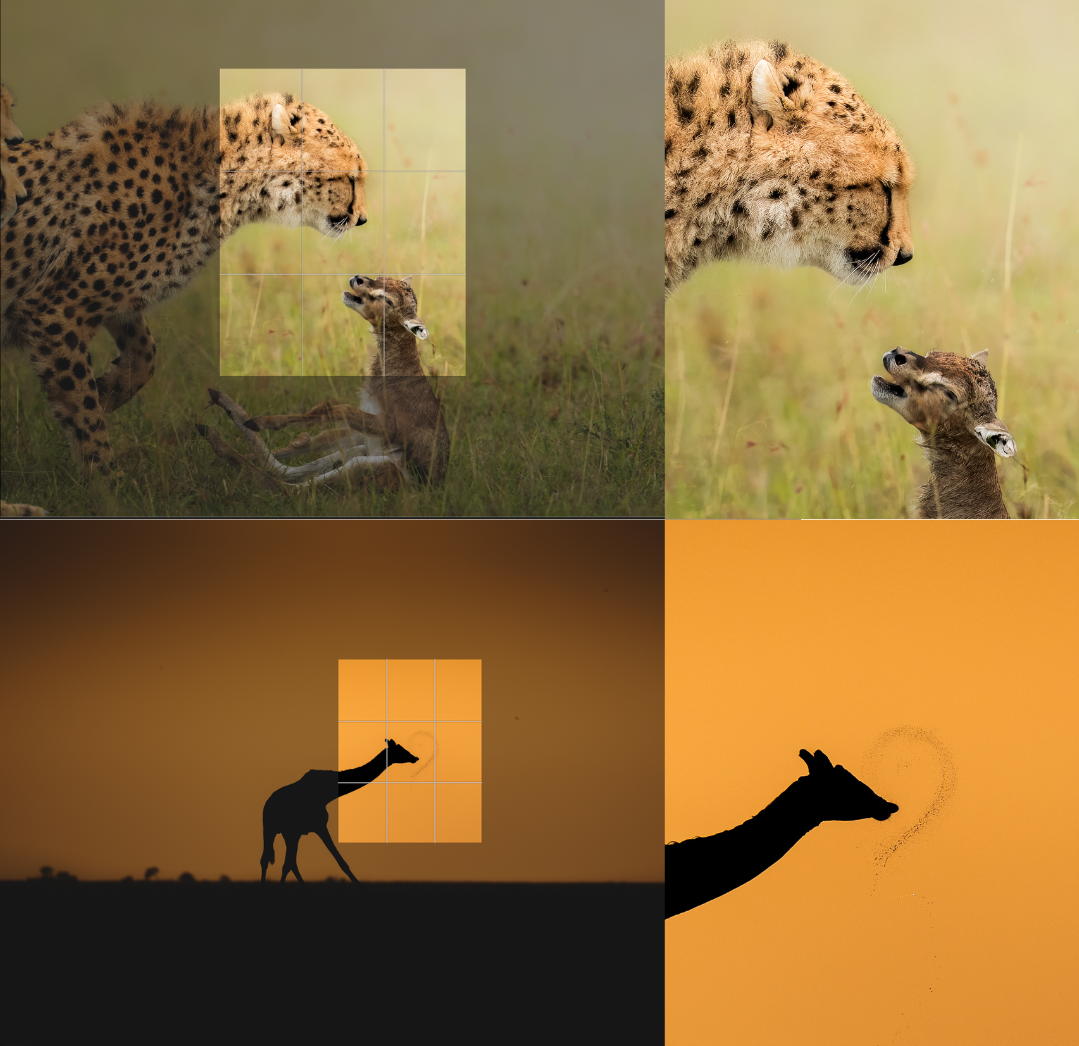
As you can see, the final crops look like entirely different stories!
Get creative with the cropping tool, and you'll unlock many hidden gems within your existing photos!
Please note:
Within the same images, you might realize that some tools help complement other tools.
When you combine more than one tool, the image becomes even more powerful.
All these tools are just principles. Master them, and then break them!
TIPS & TRICKS
Here are some not-so-obvious tips for you to try!
i) Zoom Out
When shooting, always zoom out a little.
This allows you some freedom in different crop sizes and compositional techniques when you edit these photos.
Also, having higher megapixel cameras helps a lot.
ii) Think Like A Creator
And not just a photographer. Look at the world's best photographers, and you'll realize that they consistently frame their images consciously for maximum visual effect.
Go to Instagram, stalk your favourite photographers, and analyse their images.
You're now thinking like a creator.
iii) Shoot Multiple Frames
If you have time, try to shoot the subject in different frames.
One close-up, one environment, one direction, etc.
Even try to move to a different angle to see if anything unique comes up.
This is practice, and it will certainly train your eye to tell more powerful images.
iv) Crop it like it's Hot
The cropping tool isn't there just to remove distractions. It's to help you compose your image.
It's totally okay to realize a beautiful composition in your image after you're back home.
There are many photos of mine whose visual impact changed dramatically after I cropped them in a certain way.
This is why you shouldn't delete photos that you're 50/50 about.
Use tools such as Topaz Resolution if you're losing too much detail.
v) Drop it like it's Hot
Shoot low. Please.
Especially in wildlife photography. Not only does it transform the emotional impact, but your framing too.
You see those magical foregrounds? They weren't just there. Many were unlocked due to shooting low.
You will never get a unique perspective if you shoot from angles that everyone shoots from.
It doesn't have to be necessarily low, but just different.
Moreover, when you are conscious of how you want to frame your image, you'd want to have some kind of freedom of movement.
You want to move backwards, behind, forward, lower, etc. (Ofc this is dependent on the situation)
For safaris, having the best guides helps a ton.
Move yourself. Create.
P.S. Where This Comes Alive
Everything in this guide can be practiced anywhere - your backyard, your street, your phone camera.
But there's a moment when it all clicks. And that moment almost always happens in the field, with real wildlife, real light, and someone helping you see what you're missing.
That's what my October Kenya trip is built for.
12 days across Maasai Mara, Amboseli, and Solio Reserve. Three completely different environments.
Big cats, elephants with Kilimanjaro behind them, rhinos at one of Kenya's most exclusive private reserves.
Small group. Max 3 per vehicle. I guide every drive personally, and we edit together in the evenings.
I just need one more person to confirm the trip.
If you've been sitting on this, now is genuinely the time.
Message me on instagram and I'll send you the info.
Otherwise, how'd you find this article? Hope I framed everything well ;)
Until next time,
Dhir